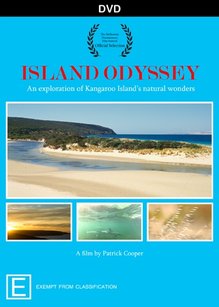
 Ive finalised the design for the DVD and Bluray covers for my film Island Odyssey. The basic design started off as a rough sketch on a piece of paper and eventually developed into it’s current form which can be seen here. I experimented a lot with different images within the cover design and it took quite a while to decide which particular images would make the final selection. In the end, I decided on the sunset over Smiths Bay, Bottlenose dolphins swimming below the water’s surface and a close up of long grass blowing in the breeze in the hills of Penneshaw for the smaller images. The Smiths Bay sunset image is a digital still photograph that is part of a time lapse sequence and the other two small images are frames extracted from High Definition video footage. By contrast, the larger image of the beach scene is a scan from 35mm slide film shot at Antechamber Bay.
As can be seen, blue is the dominant colour in the cover design. I thought that this was appropriate considering that the film is about an island and islands are surrounded by water. And for those who are wondering, the Bluray cover will be pretty much identical to what is shown here except the word ‘Bluray’ will be featured in the black banner at the top in place of the ‘DVD’ text. The printing of the paper inserts that slip into the disc covers have been completed by Hash Print, a company located on King William Street in Adelaide, South Australia. They did a great job and I was impressed at how accurate they are with their trimming – right down to the nearest millimetre or even half a millimetre if you request. I had included crop marks and bleed with my file and allowed plenty of communication regarding my requests so this certainly made their job easier. I decided on a glossy coated 130 gsm paper which looks very nice when placed inside the disc covers.
0 Comments
In addition to using existing footage that I had already shot, I also ventured out to various locations around the island to shoot new footage specifically for Island Odyssey. A number of times, I hiked through the hills of Penneshaw to shoot time lapse of shadows cast by trees for one particular segment in the film. This was pretty hard going as it was summer and it took some time to find suitable locations for shooting. The heat was intense, the flies were annoying and I was covered in sweat by the time I had found a good spot and set up the tripod. At least once I was there, I could take it easy in the shade and let the camera click away for a few hours for a few hours. The editing of new and old footage took a considerable amount of time. I produced about seven different versions of Island Odyssey, each one slightly improved over the previous version. Some reshoots were also required so it was certainly convenient living on the island so I could go out and obtain the extra footage that I needed. Consequently, production and postproduction overlapped quite significantly. I also had ideas for other kinds of shots like footage of invertebrates like crabs and insects but unfortunately, I ran out of time. My aim was to submit Island Odyssey to film festivals and there were some deadlines that I had to meet. In order to submit to film festivals, I had to familiarise myself with FilmFreeway. FilmFreeway simplifies the submission process immensely and allows one to submit to a whole range of film festivals with minimal effort. You only need to fill in the relevant details about yourself and your film just once and then select as many film festivals as you wish to enter. FilmFreeway also supports the ability to add Vimeo links which is required by the majority of film festivals. The filmmaker uploads their film to Vimeo in a private link and shares the password with the respective film festival via FilmFreeway. After reviewing your film, the film festival will then decide whether or not to accept your film for screening. If successful, you will be required to deliver a hard copy of your film which is usually accompanied by promotional material. https://filmfreeway.com/ Some film festivals also require you to submit a trailer for your film. This was definitely a new experience for me as I had never made a film trailer before. I started work on putting a trailer together, selecting various pieces of footage that I had accumulated for Island Odyssey. I tried to select a wide variety of subject matter that was shot in different kinds of environments. This included wildlife, landscapes, underwater and above water environments. After editing these segments together, I felt that I had a trailer that represented my film in a fairly convincing manner. On a final note, I’ll add that Island Odyssey has been selected for screening at the Melbourne Documentary Film Festival. As mentioned in my previous blog entry, I had accumulated a fair bit of HD footage of the natural attractions of Kangaroo Island over the last few years (both time lapse and regular video footage.) There was a good mix of landscapes, flora and wildlife amongst my recorded subject matter. I decided that I would like to edit these various clips together into some kind of cohesive whole. After selecting the best pieces of footage and culling the rest, perhaps I had enough material to produce a short film which I could submit to film festivals. I decided to call the film Island Odyssey. I thought that this was an appropriate title as the film would take the viewer on a kind of journey around the island, revealing the various natural wonders that can be found here. And indeed, Kangaroo Island does have a lot to offer in terms of natural attractions. There was one particular piece of footage that required a fair bit of planning and had a very interesting outcome. The plan was to set up my GoPro camera in a stationary position underwater in a marine environment and use bait to lure fish in. The camera would be recording over a long period of time and it was hopeful that I would capture some natural fish behaviour. The tricky thing was keeping the GoPro in a fixed position. At first, I tried to attach the camera to a rock with an adhesive pad but that would not hold. After several seconds, the GoPro broke free and began floating in the water. I then had the idea of using wires to secure the GoPro to a scuba diving weight belt and this worked quite well. While setting up the camera and weight belt in to position in a rather rocky location outside Christmas Cove in Penneshaw, I had to be partly submerged myself. I used chicken meat as bait which was also attached to the weight belt with wires. I left the camera recording for a little over half an hour while I kept out of sight not too far away. The resulting footage had quite a bit of interesting fish activity with zebra fish and sweep featuring predominantly. There were also a few points during the footage where some blennies made an appearance too though they were generally quite far away from the camera. A short excerpt from the footage can be seen below. 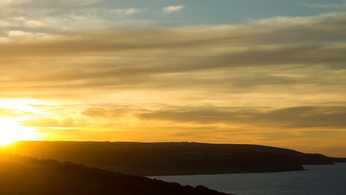 For a number of years, I have been shooting time lapse the old fashioned way on super 8 movie film. Most of that material was shot with my trusty Canon 1014 Autozoom Electronic camera. In more recent years, I have been doing time lapse on digital. My camera of choice was initially a Panasonic G2, a Micro 4/3 camera with interchangeable lenses. I bought a cheap Chinese made interval timer from eBay for this camera which allows me to set pretty much any interval time I require. I have since acquired a Panasonic G6 which features a built in interval timer. A great thing about the G6 is that not only does it feature full HD video recording but also full manual exposure control during video mode. You can even change the iso setting in video mode. My gripe with many modern cameras is that although a lot of them will give you manual exposure control in the still photography mode at least, when you switch to video mode, everything is automatic. So basically all control is taken away from you when you shoot video. And that’s a great thing about the higher end models in the Panasonic G series M4/3 cameras – you still have that creative control, regardless of what mode you’re in. However, I should point out that when shooting time lapse with a digital camera, the video recording mode is not used. You’re basically using it like a regular stills camera – taking lots and lots of photographs. Because that’s what time lapse essentially is – shooting a large number of still images with pre-set interval times. Talking a little bit more about the technical aspects of shooting time lapse on digital, one issue that can arise is flicker. This can be caused by two things – namely the aperture and the shutter. With many modern camera and lens combinations, the aperture blades remain wide open until you take the photo. The aperture blades close down for the duration of the exposure and then open once again. Though the dilemma is that the aperture blades may not close down to precisely the same position ever time a photo is taken. There may be minute variations that can cause a slight flickering effect when the individual stills are assembled into a video file and the footage is played back. One solution to this is to use lenses with manual aperture rings and an adapter. With this kind of set up, there is no linkage between the aperture and the camera body. Hence the aperture blades will remain in a fixed position throughout the shooting session. They will not close down and open when a photograph is taken. Fortunately for me, I have a set of old Canon FD lenses that I use with my Canon A series and T series 35mm SLR cameras. I use these lenses with an adapter on my Panasonic cameras when shooting time lapse to eliminate flicker from the aperture. Though as previously mentioned, flicker can also be caused by the shutter. More specifically using too fast a shutter speed. This can easily be corrected by using slow shutter speeds. Around 1/30th or slower will usually do the trick though you may need neutral density filters when shooting in bright sunlight to achieve this. I have been based on Kangaroo Island in South Australia for a while now and for the last four years, I have accumulated quite a bit of time lapse of natural phenomena on the island. Such subjects include clouds, sunsets, shadows, stars and the movement of water. I admit that I was an avid watcher of nature documentaries when I was growing up and I always enjoyed the time lapse photography on these kind of shows. This had influenced me to get involved in shooting time lapse myself – first with super 8 film and then later on digital with the Panasonic M4/3 cameras. Regarding the digital time lapse on Kangaroo Island, I now had a nice little collection of clips of various aspects of nature. Though the question arose – what would I actually do with the footage? Playing them back as individual clips for myself and others was all nice and well but could they be used in a commercial manner in some way? Stock footage perhaps? The answer can be found in my next blog post. Stay tuned! 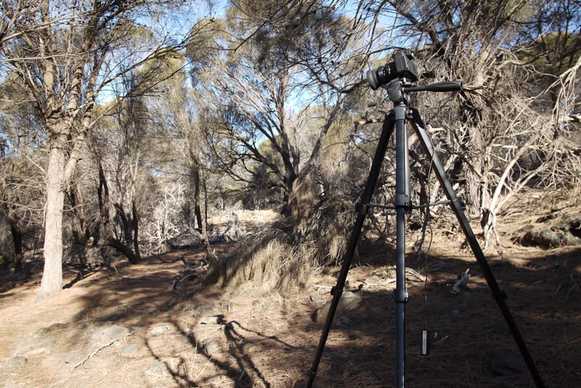 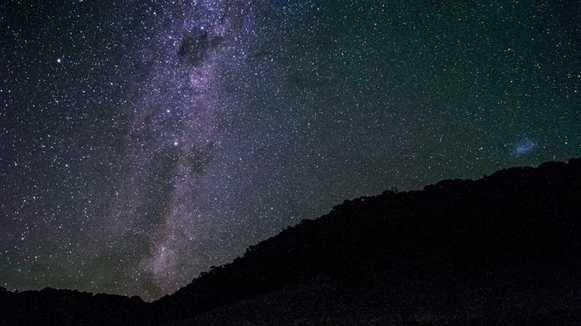 |
Author
|
 RSS Feed
